


Roof Leak Repair in Malden, MA
After Hidden Siding and Flashing Issues
A Malden roof leak investigation that uncovered siding leak issues, flashing problems, and water intrusion around a sunroom addition.
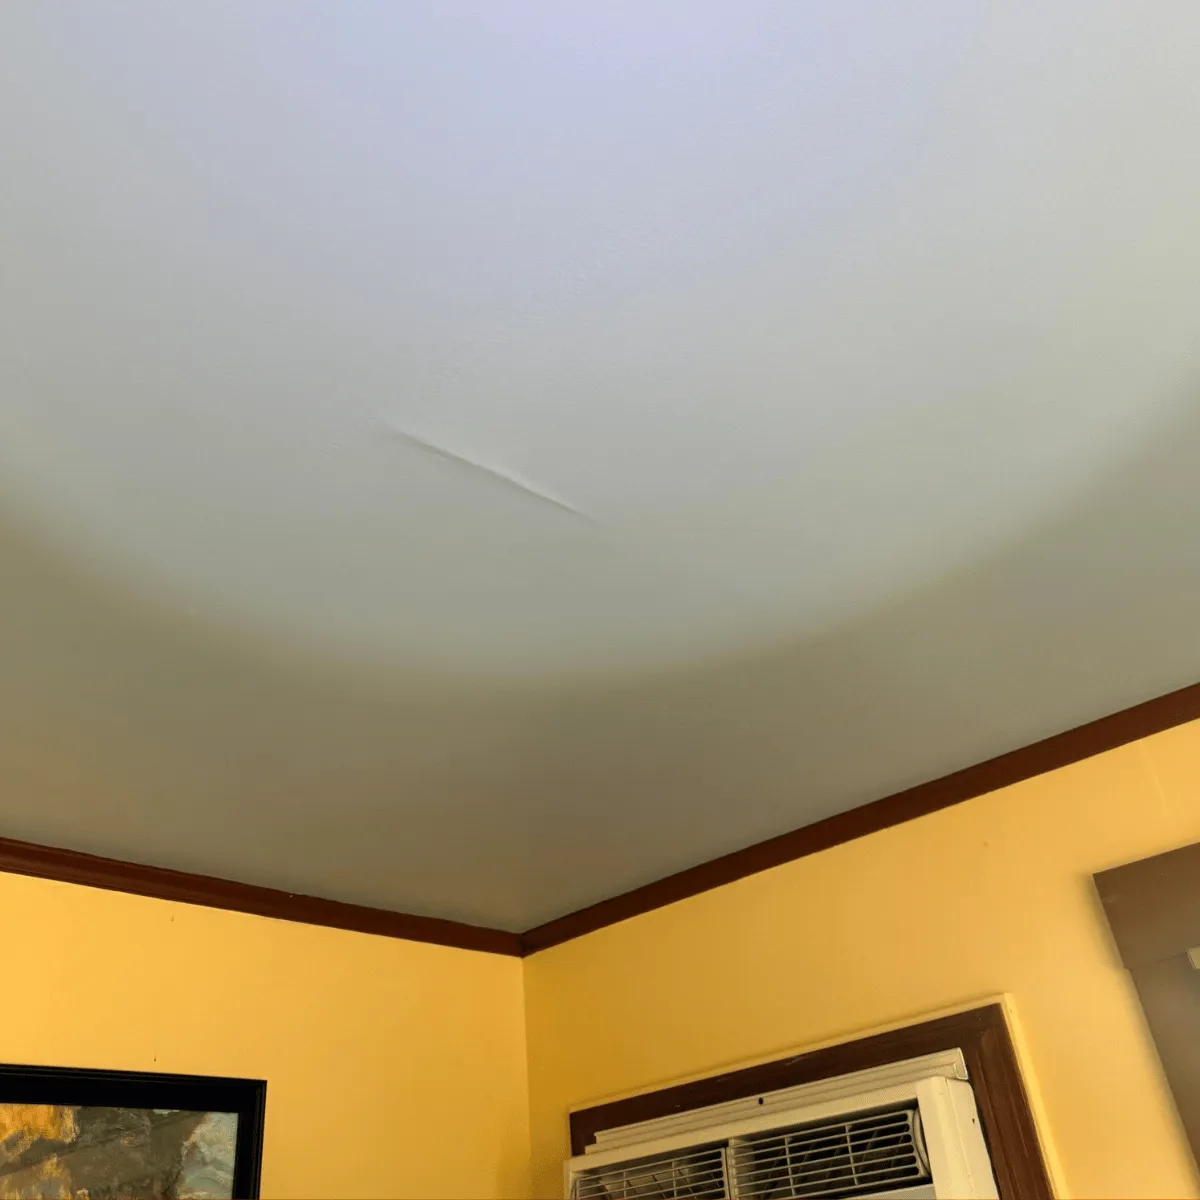
This project began as a roof leak investigation for a homeowner in Malden, MA experiencing active water intrusion near a sunroom addition. While the leak initially appeared to be coming from the roof, our inspection revealed a more complex issue involving the roof-to-wall transition, flashing system, cedar shake siding, and signs of previous repair attempts.
By identifying the actual water entry path instead of assuming the shingles were the problem, we were able to develop a targeted repair plan designed to stop the leak at its source.
Roof Leak Repair in Malden Starts With Finding the Real Source
Many homeowners searching for roof leak repair in Malden, MA assume the roofing shingles are always the source of the problem. In reality, water can travel behind siding, flashing, trim, and wall assemblies before becoming visible inside the home.
This is especially common during wind-driven rain events and New England Nor'easters, where water can enter vulnerable roof-to-wall transitions and other exterior connections.
For this project, our inspection focused on identifying the actual leak source before recommending repairs.
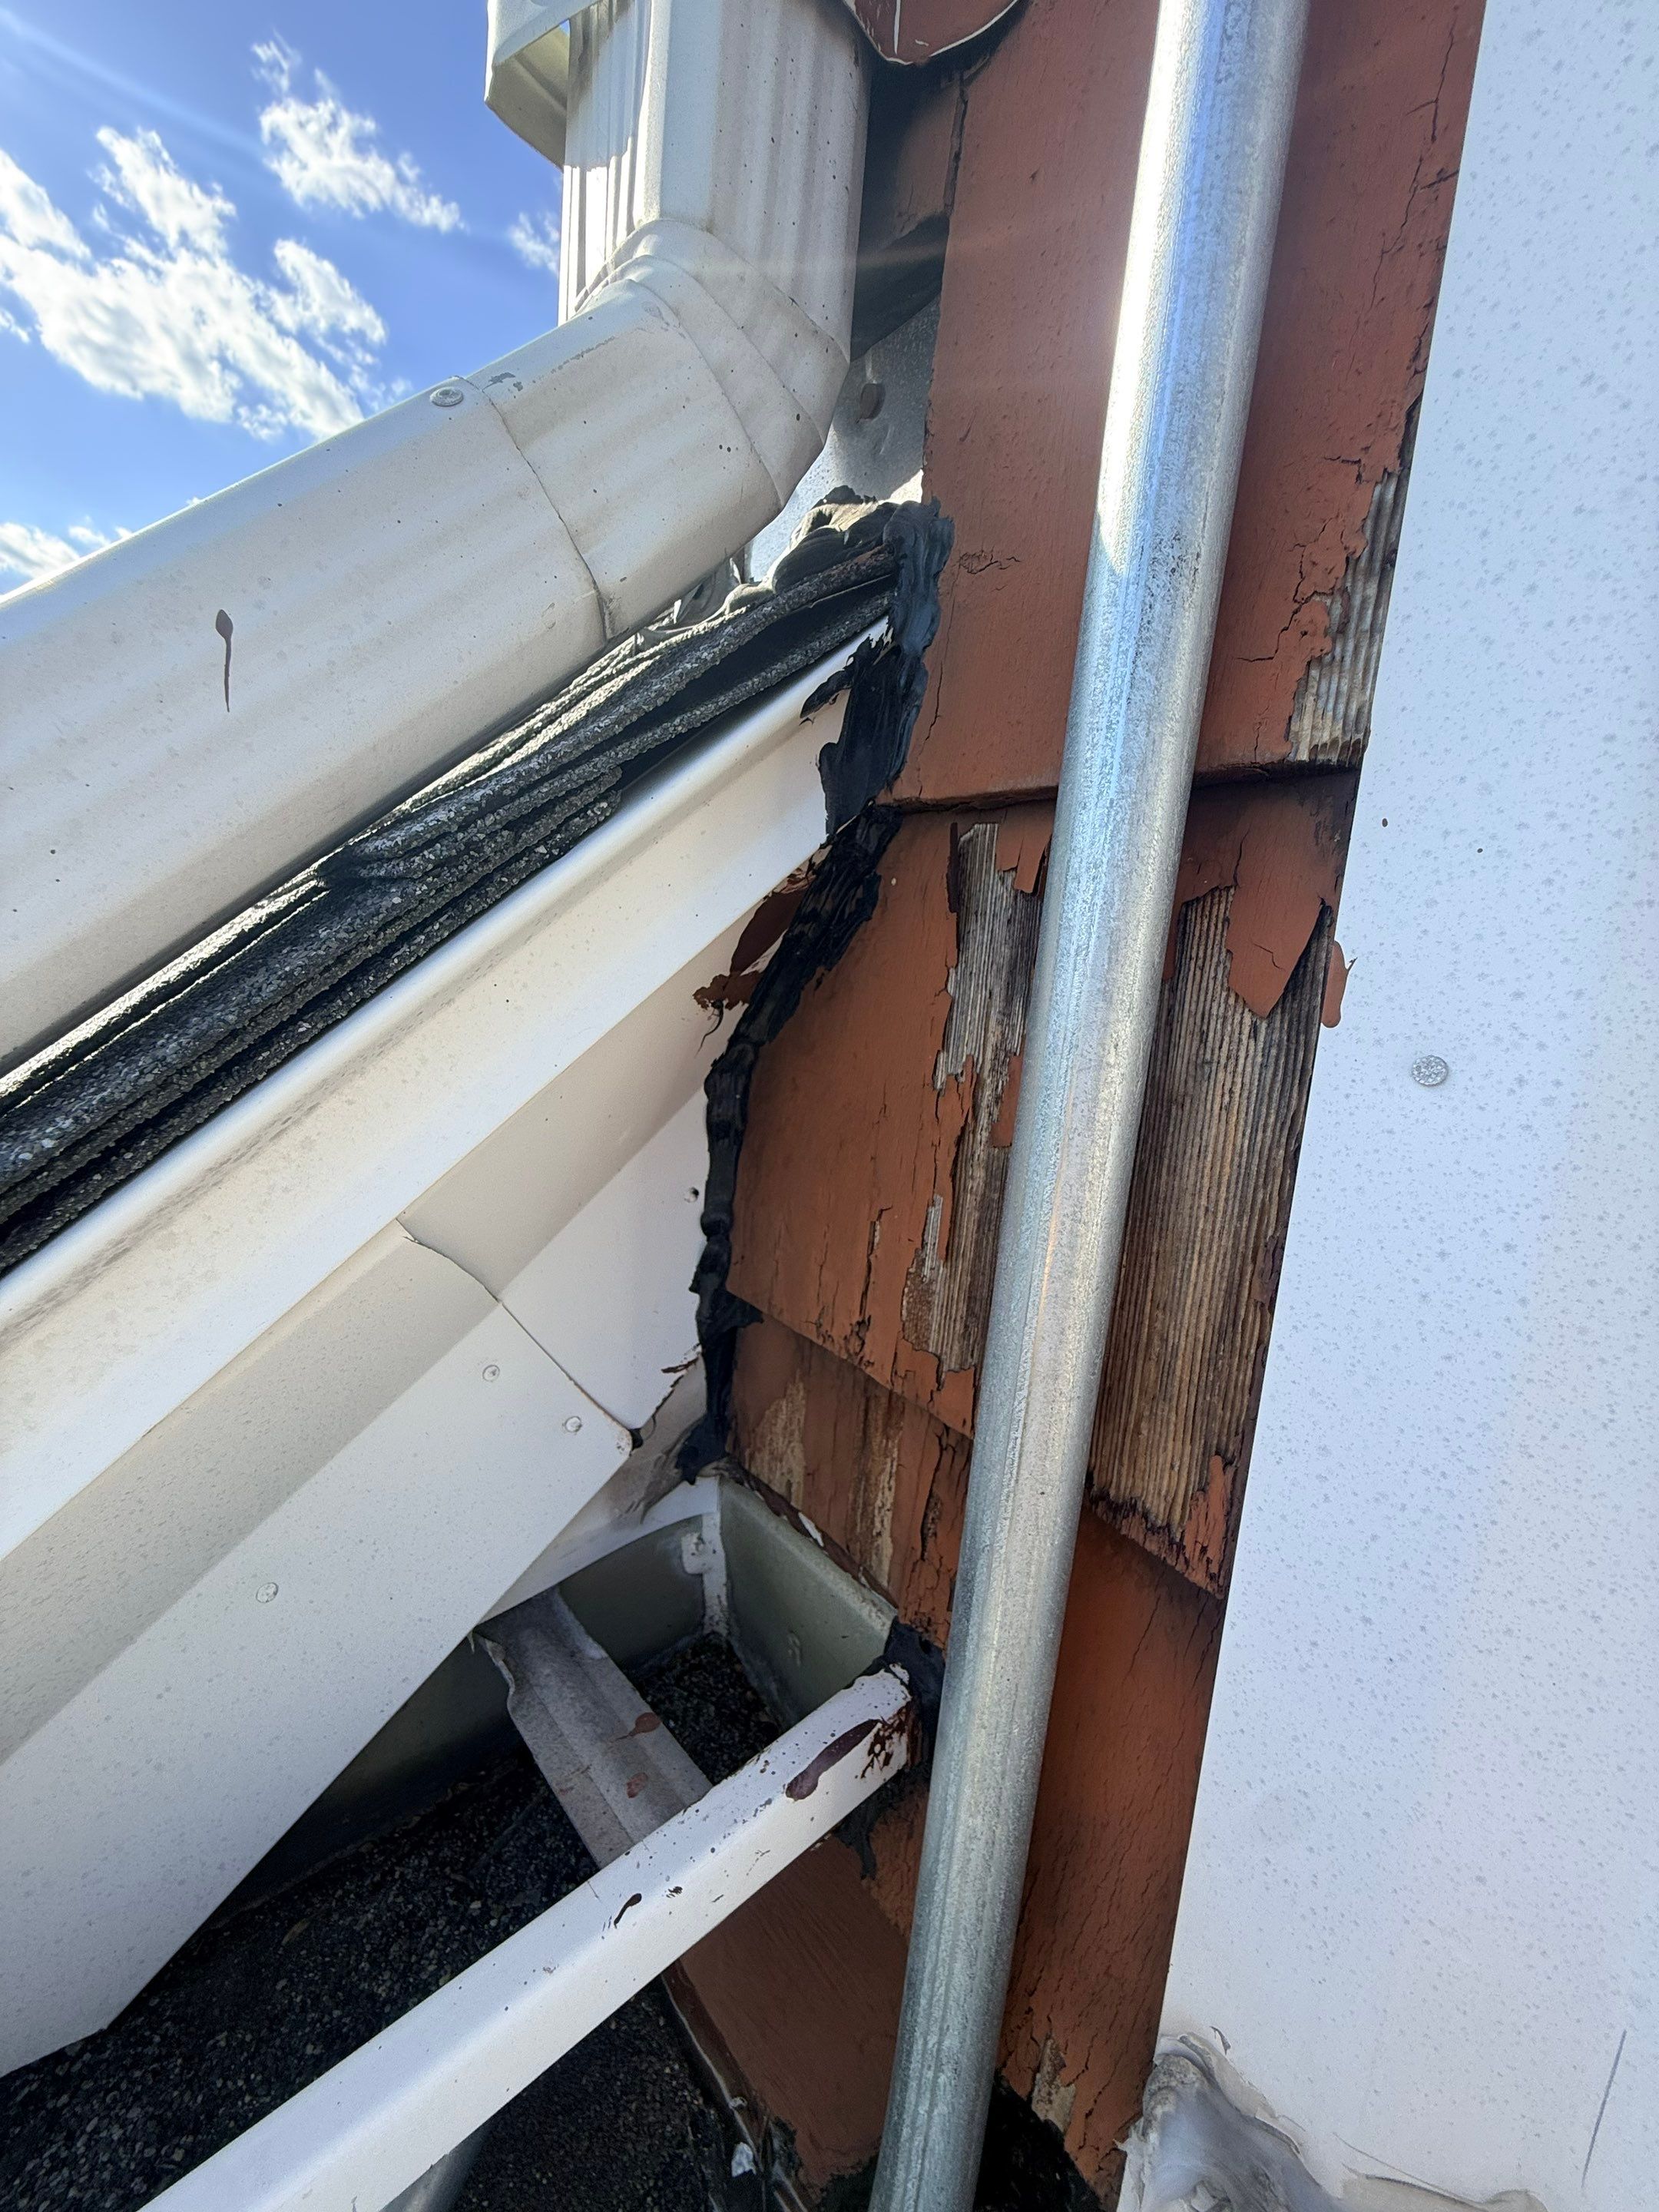
What the Roof Leak Inspection Revealed
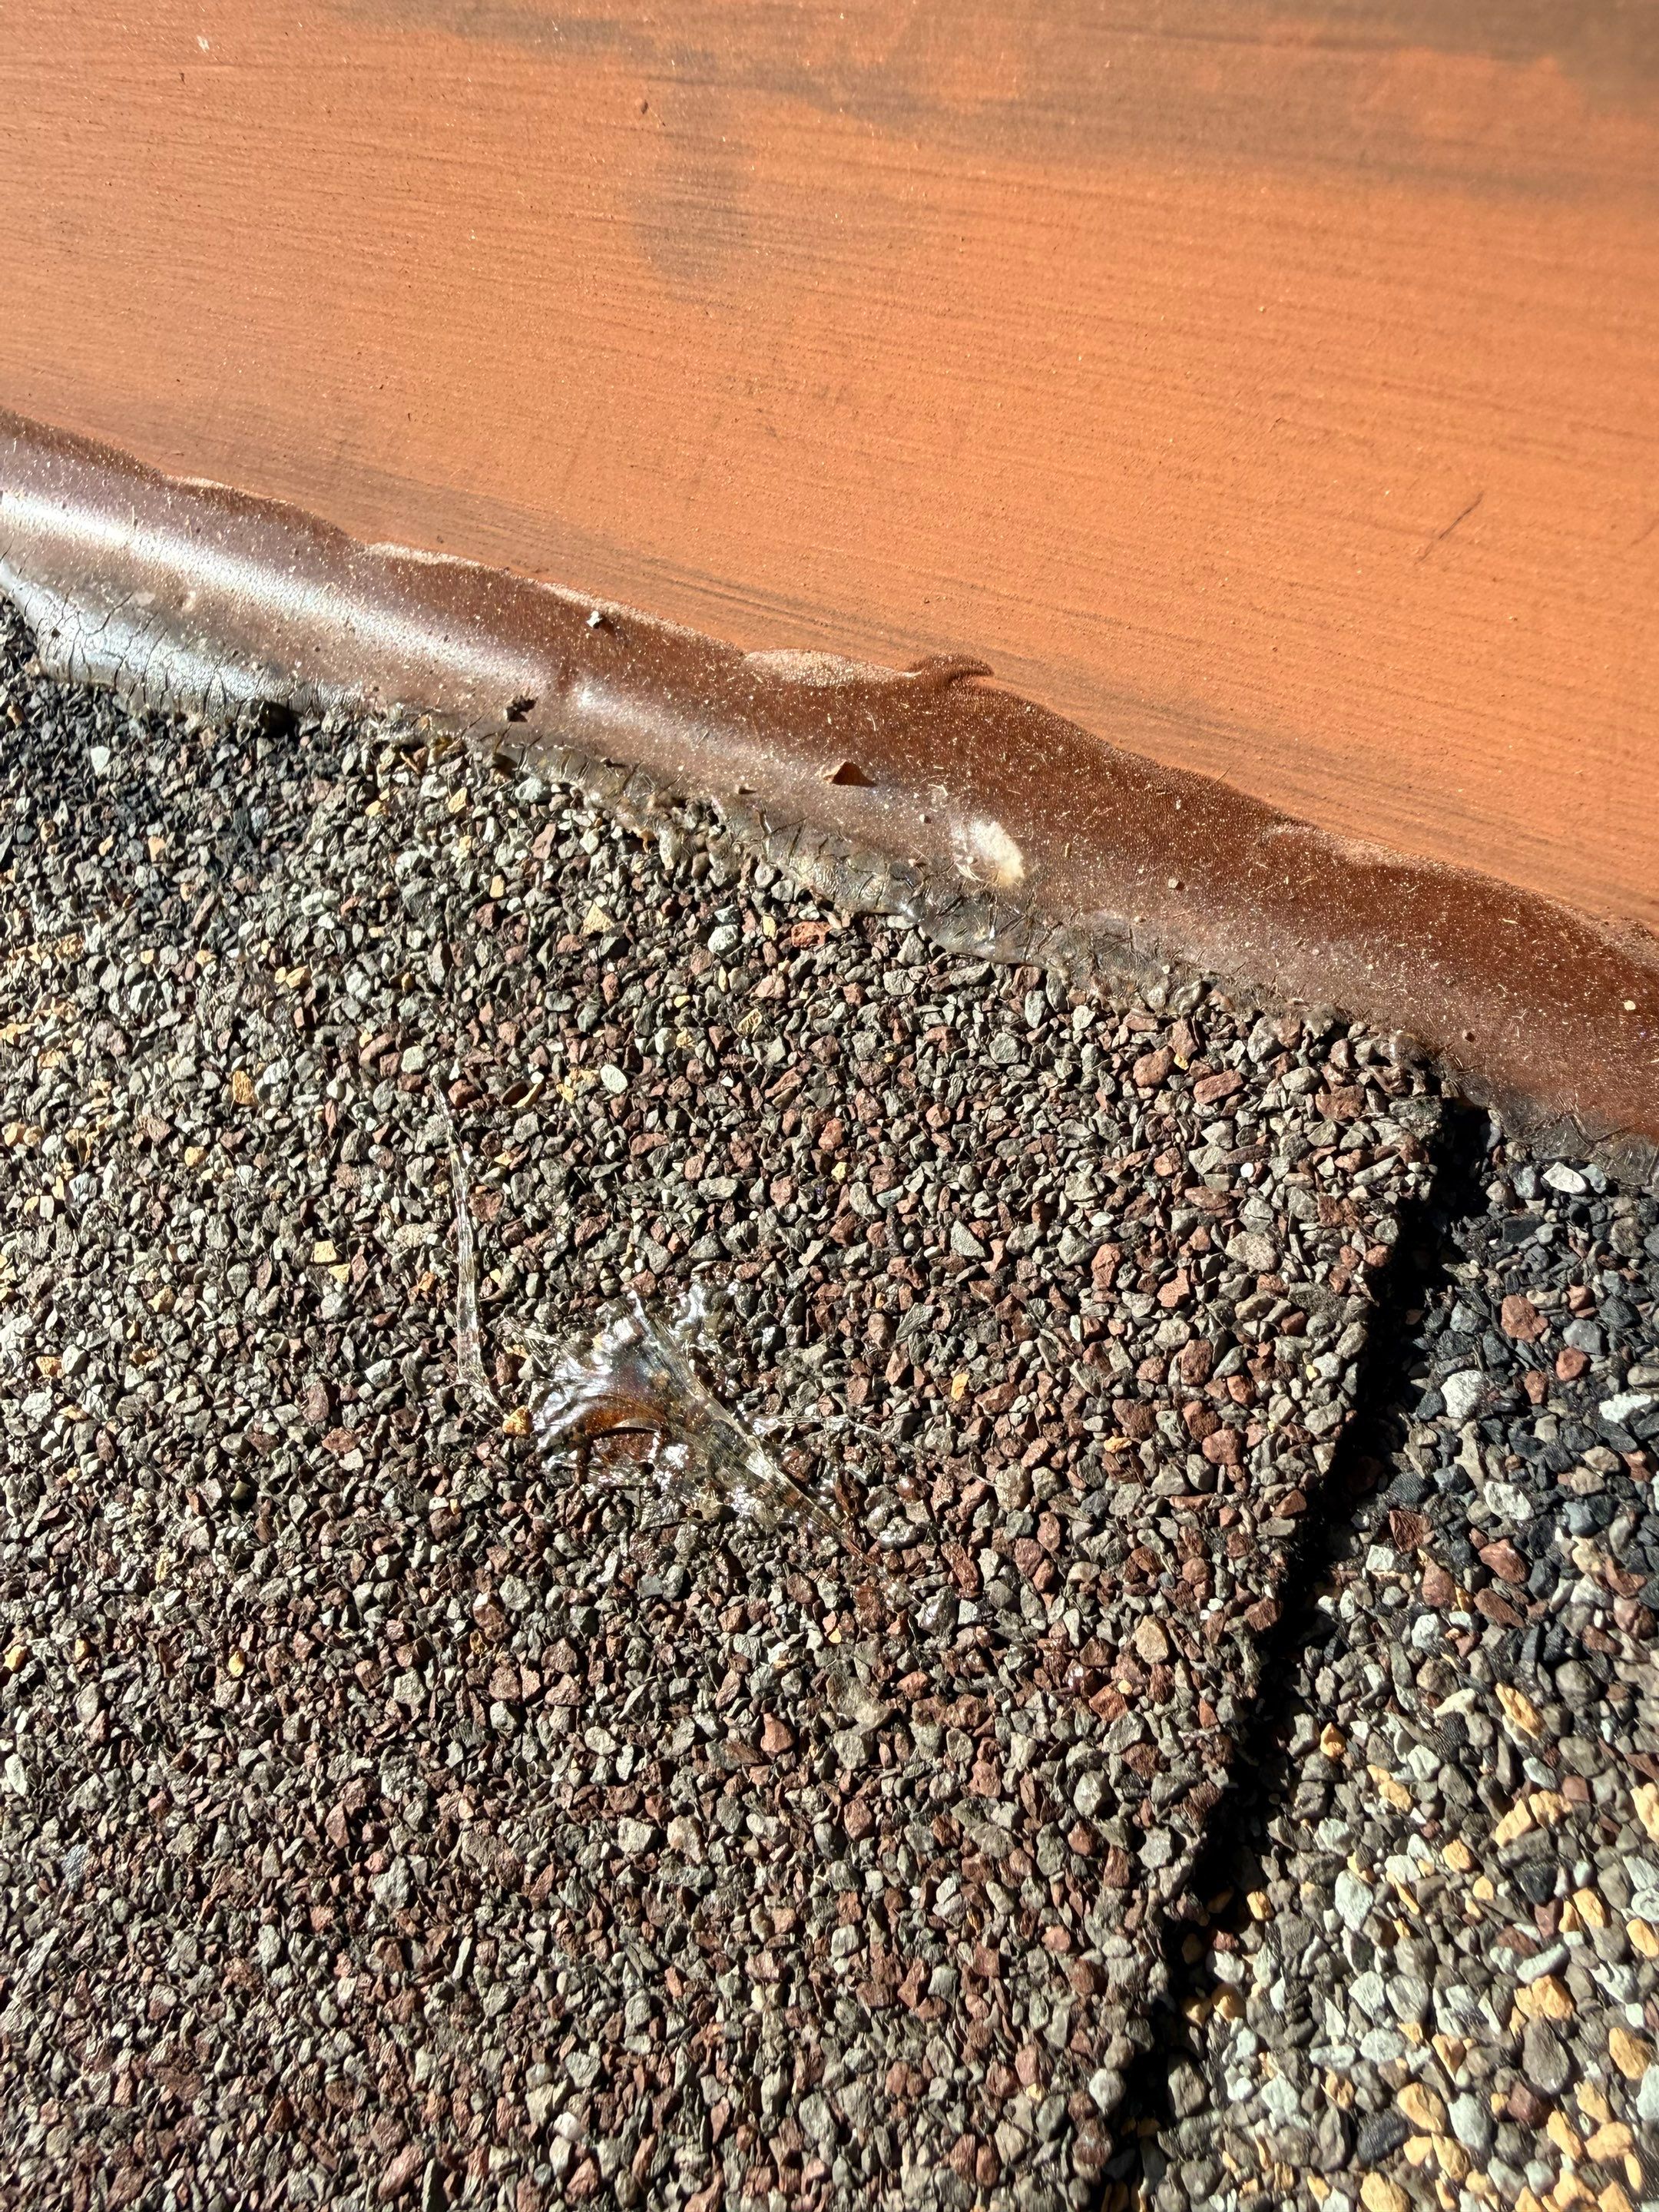
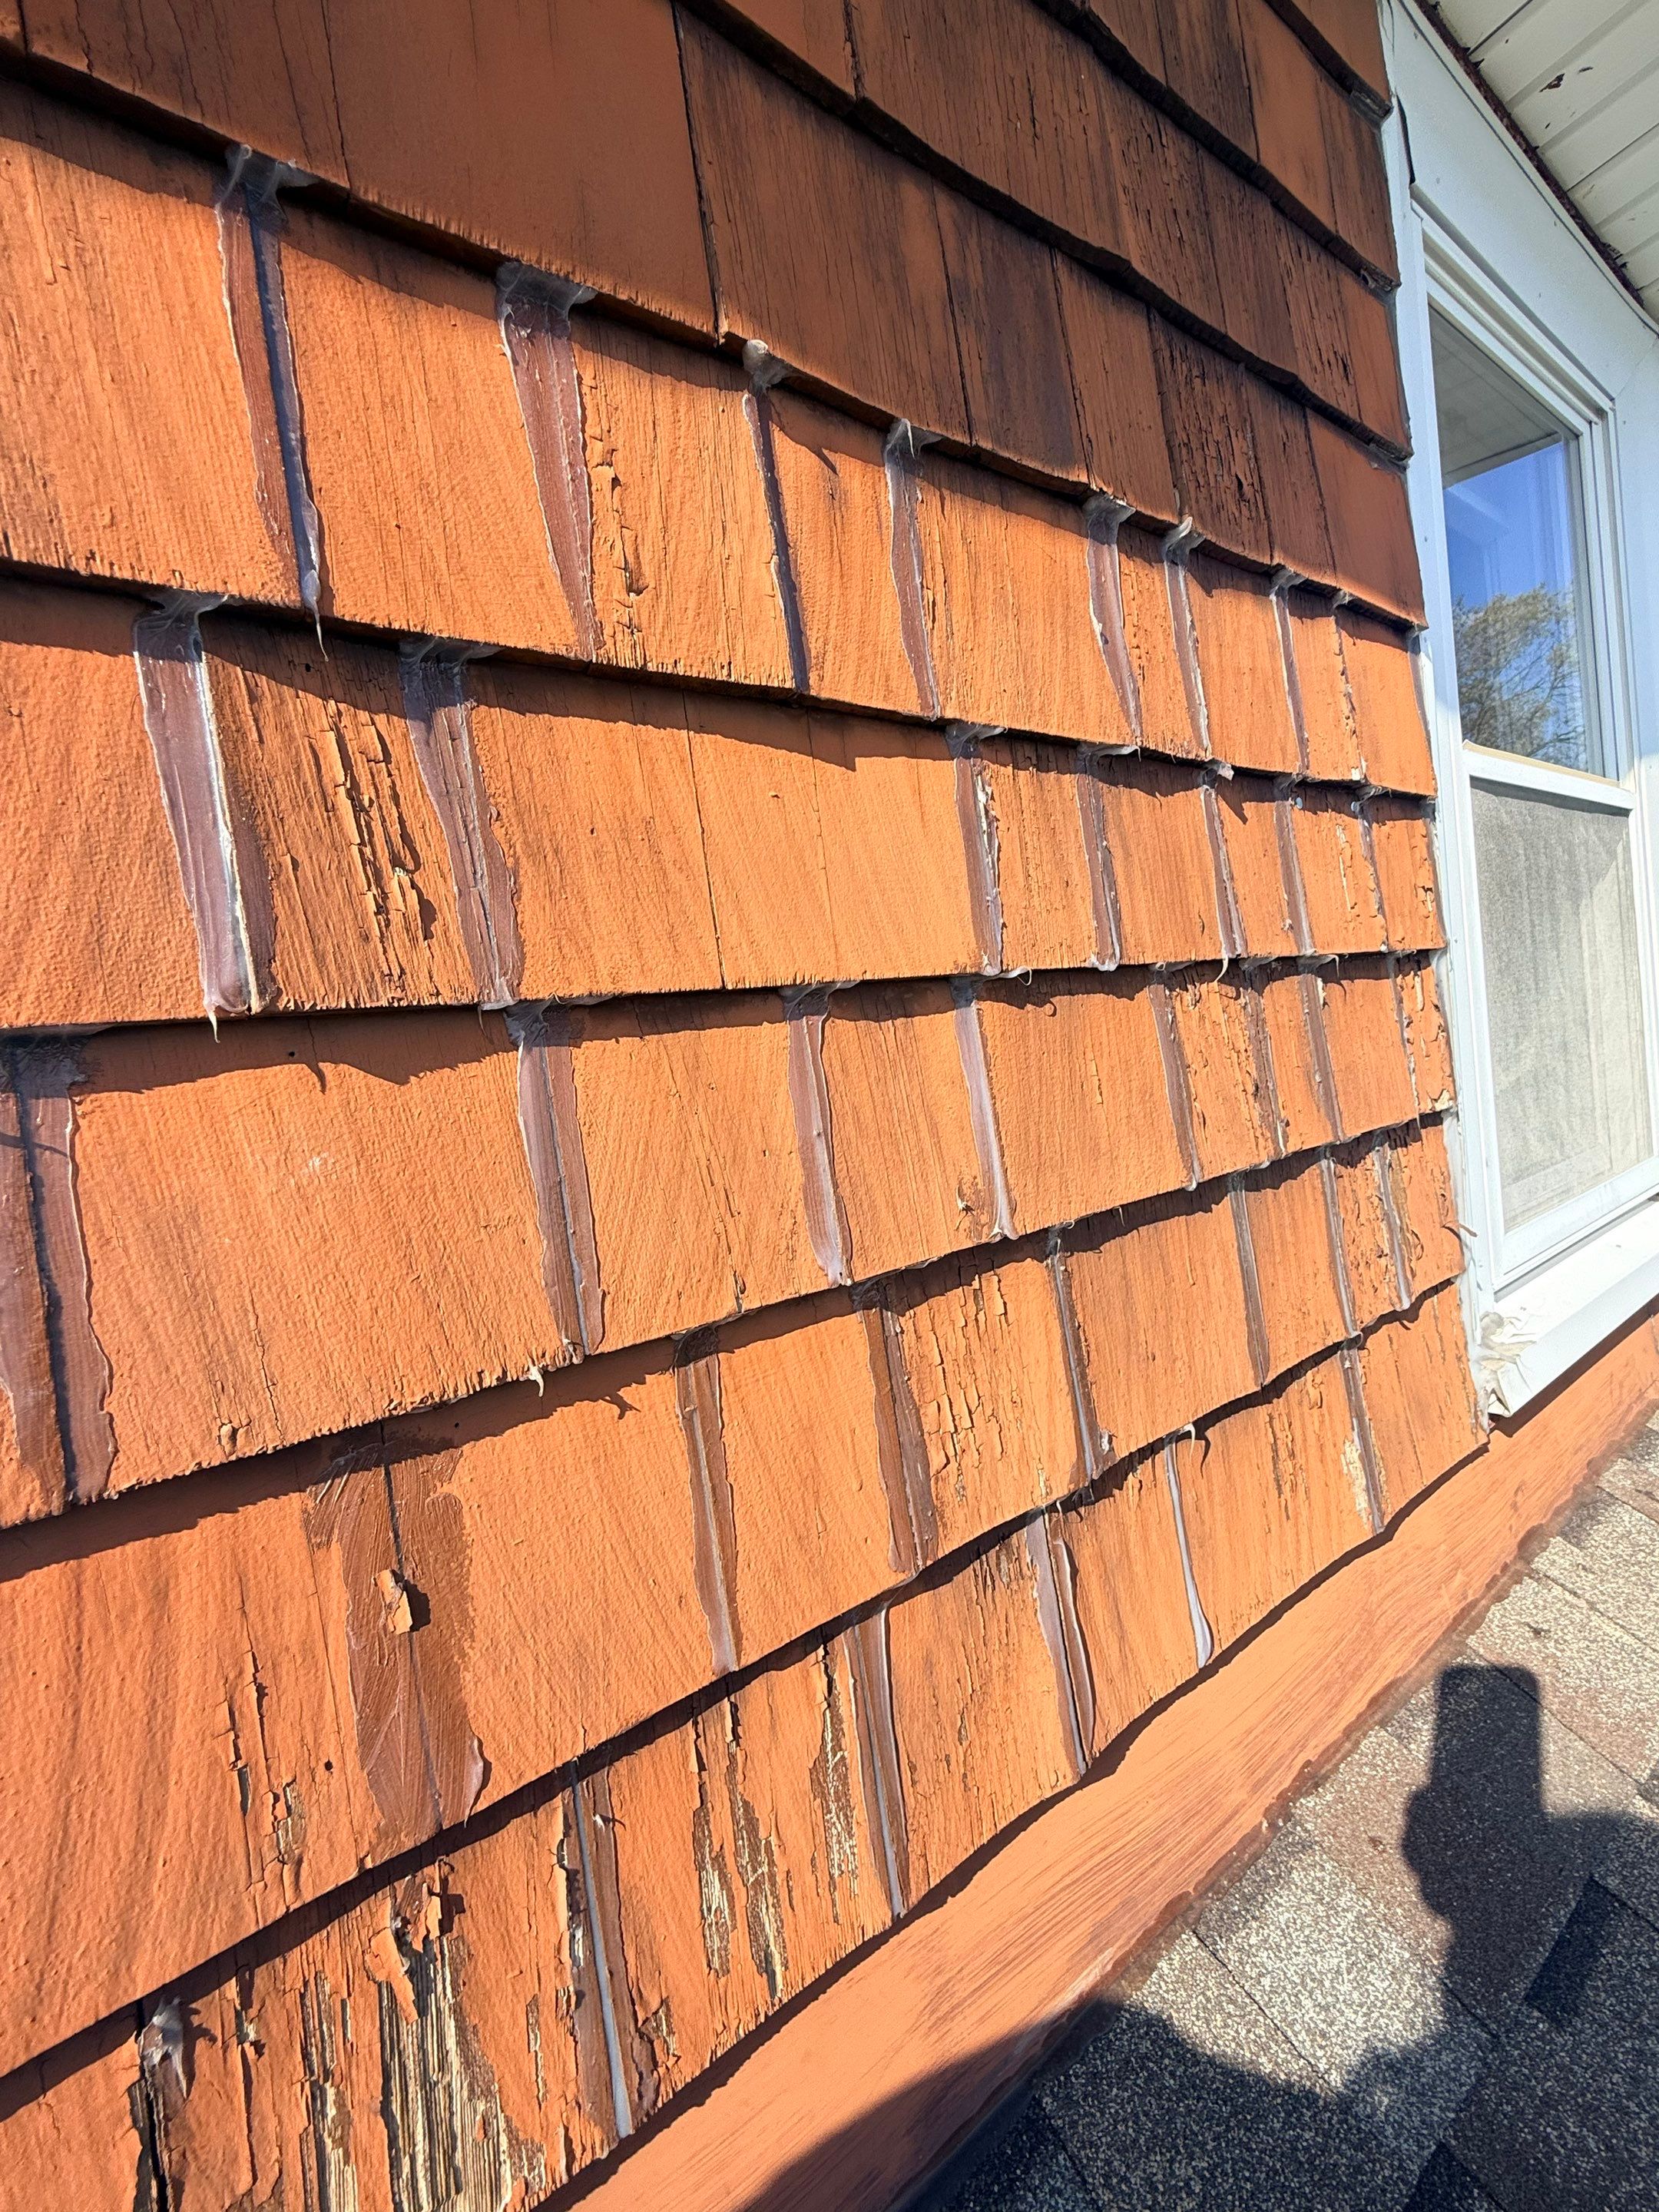
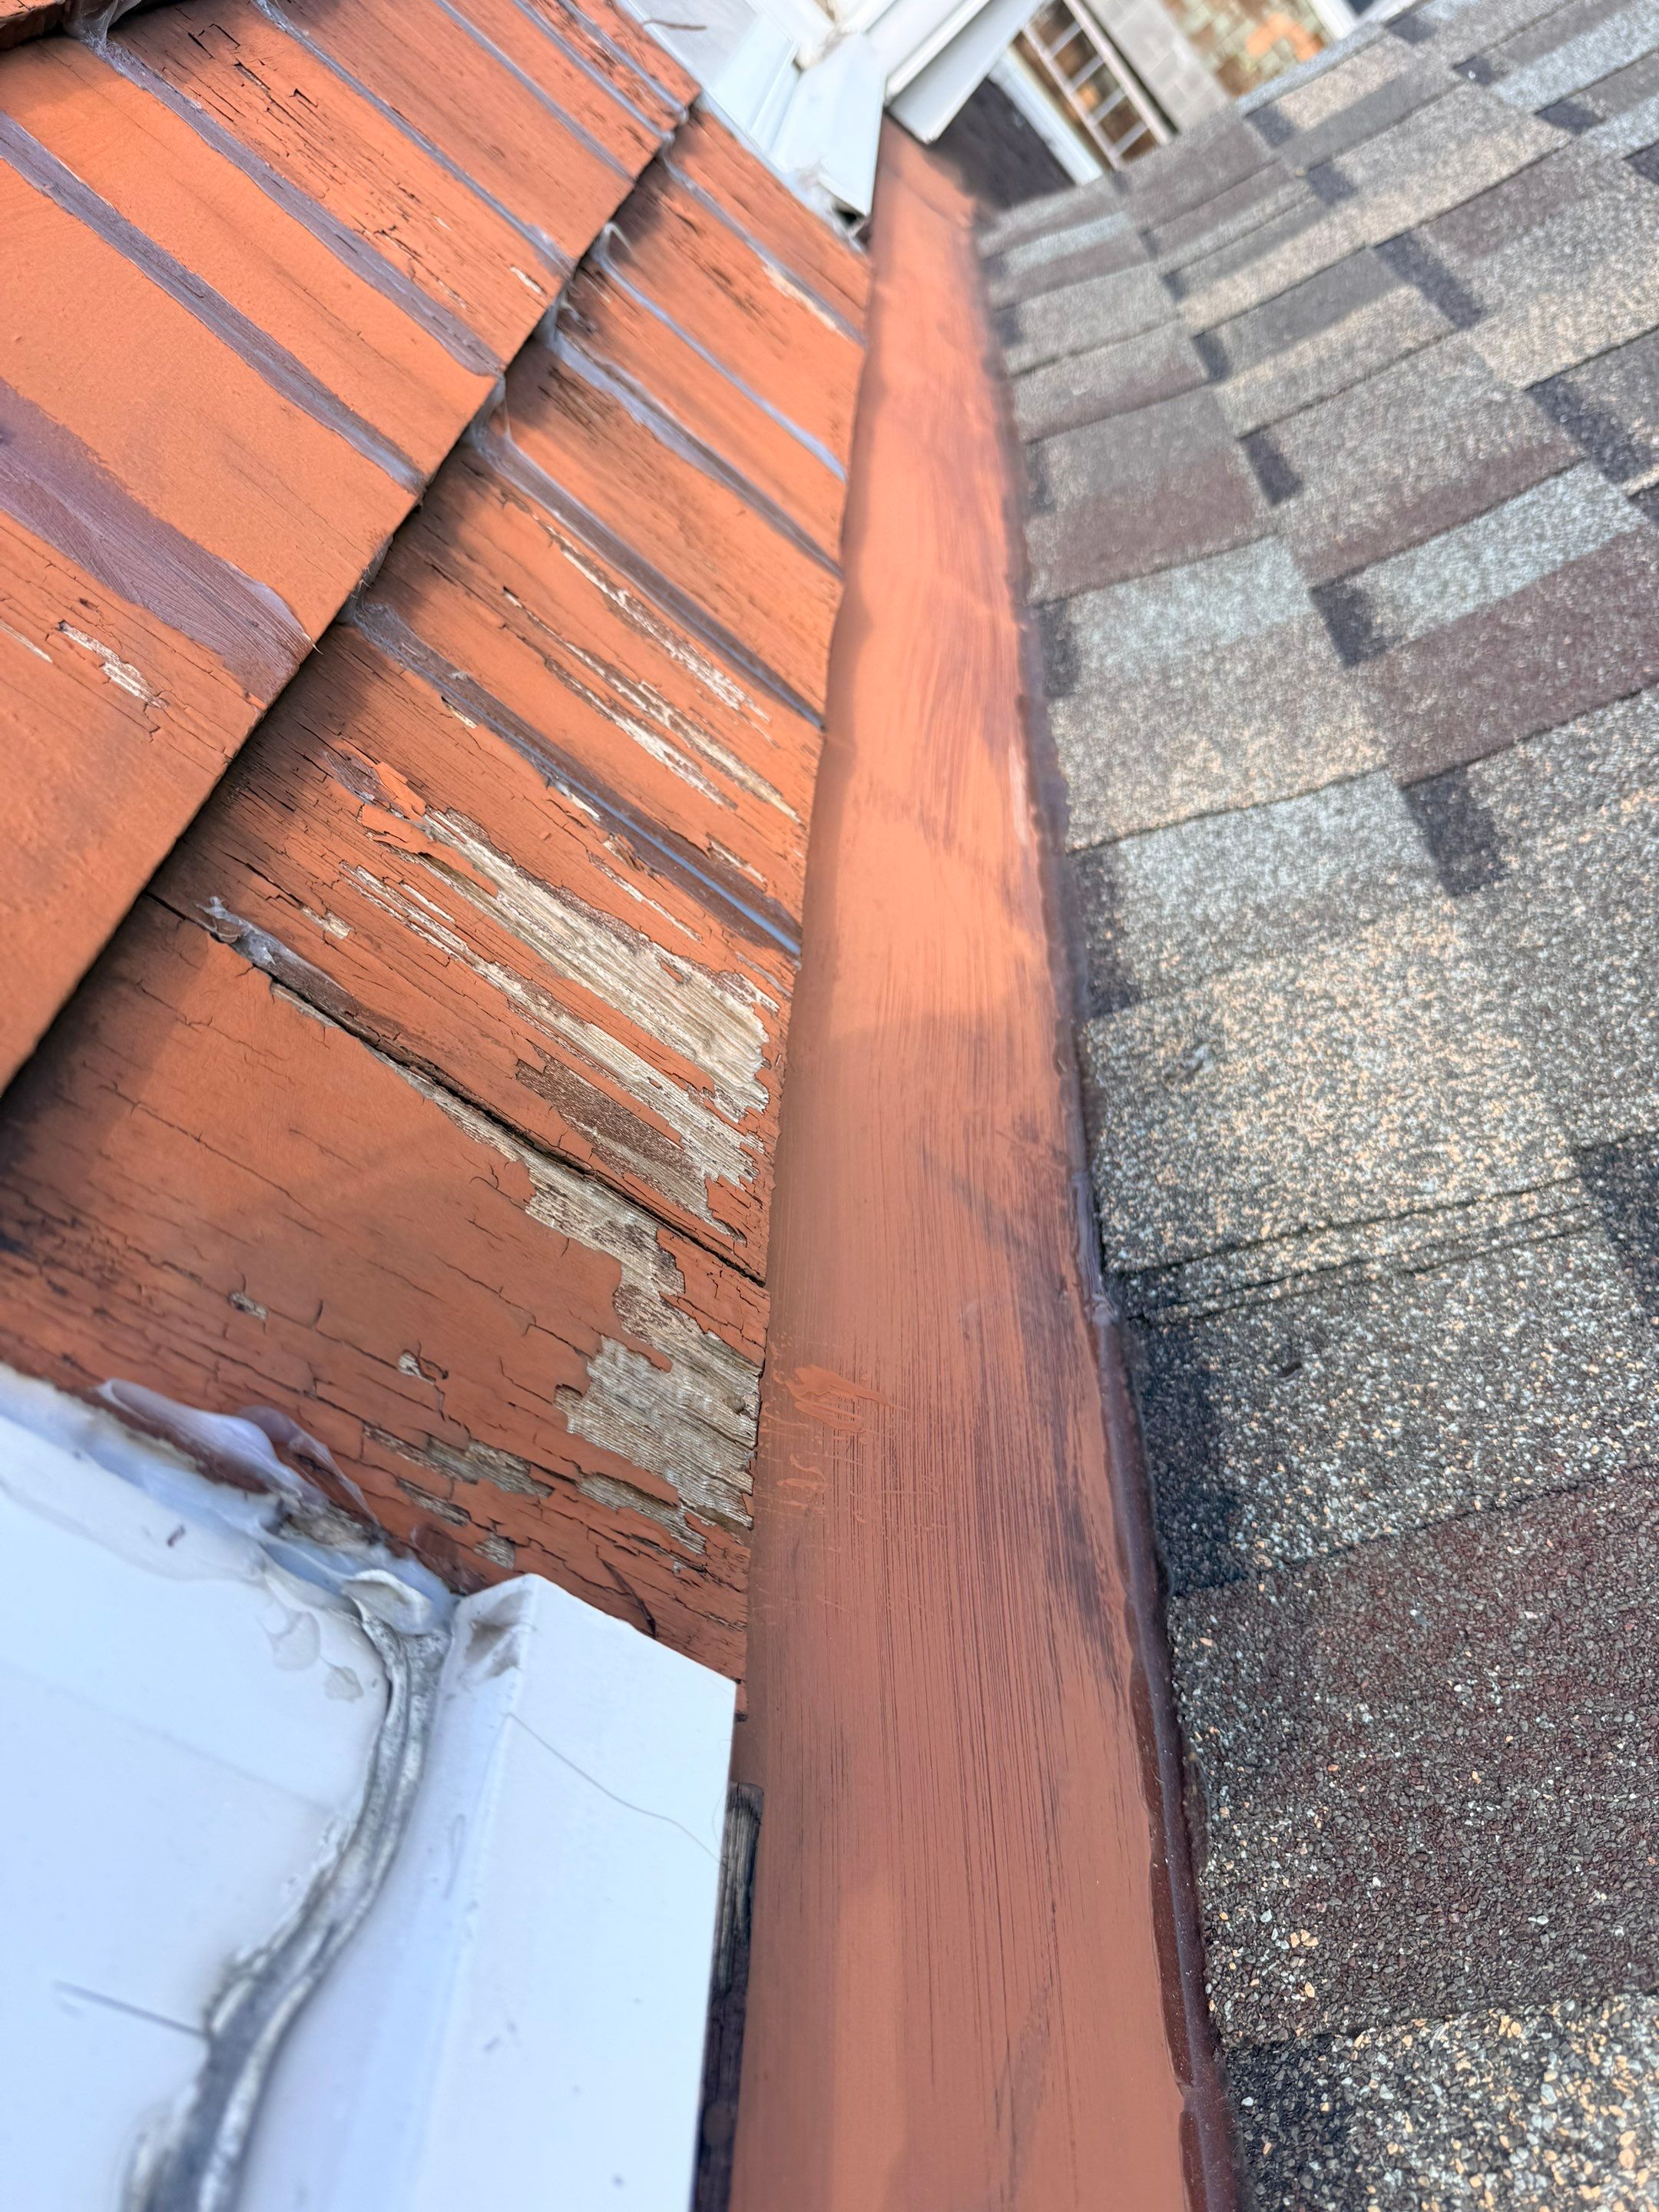
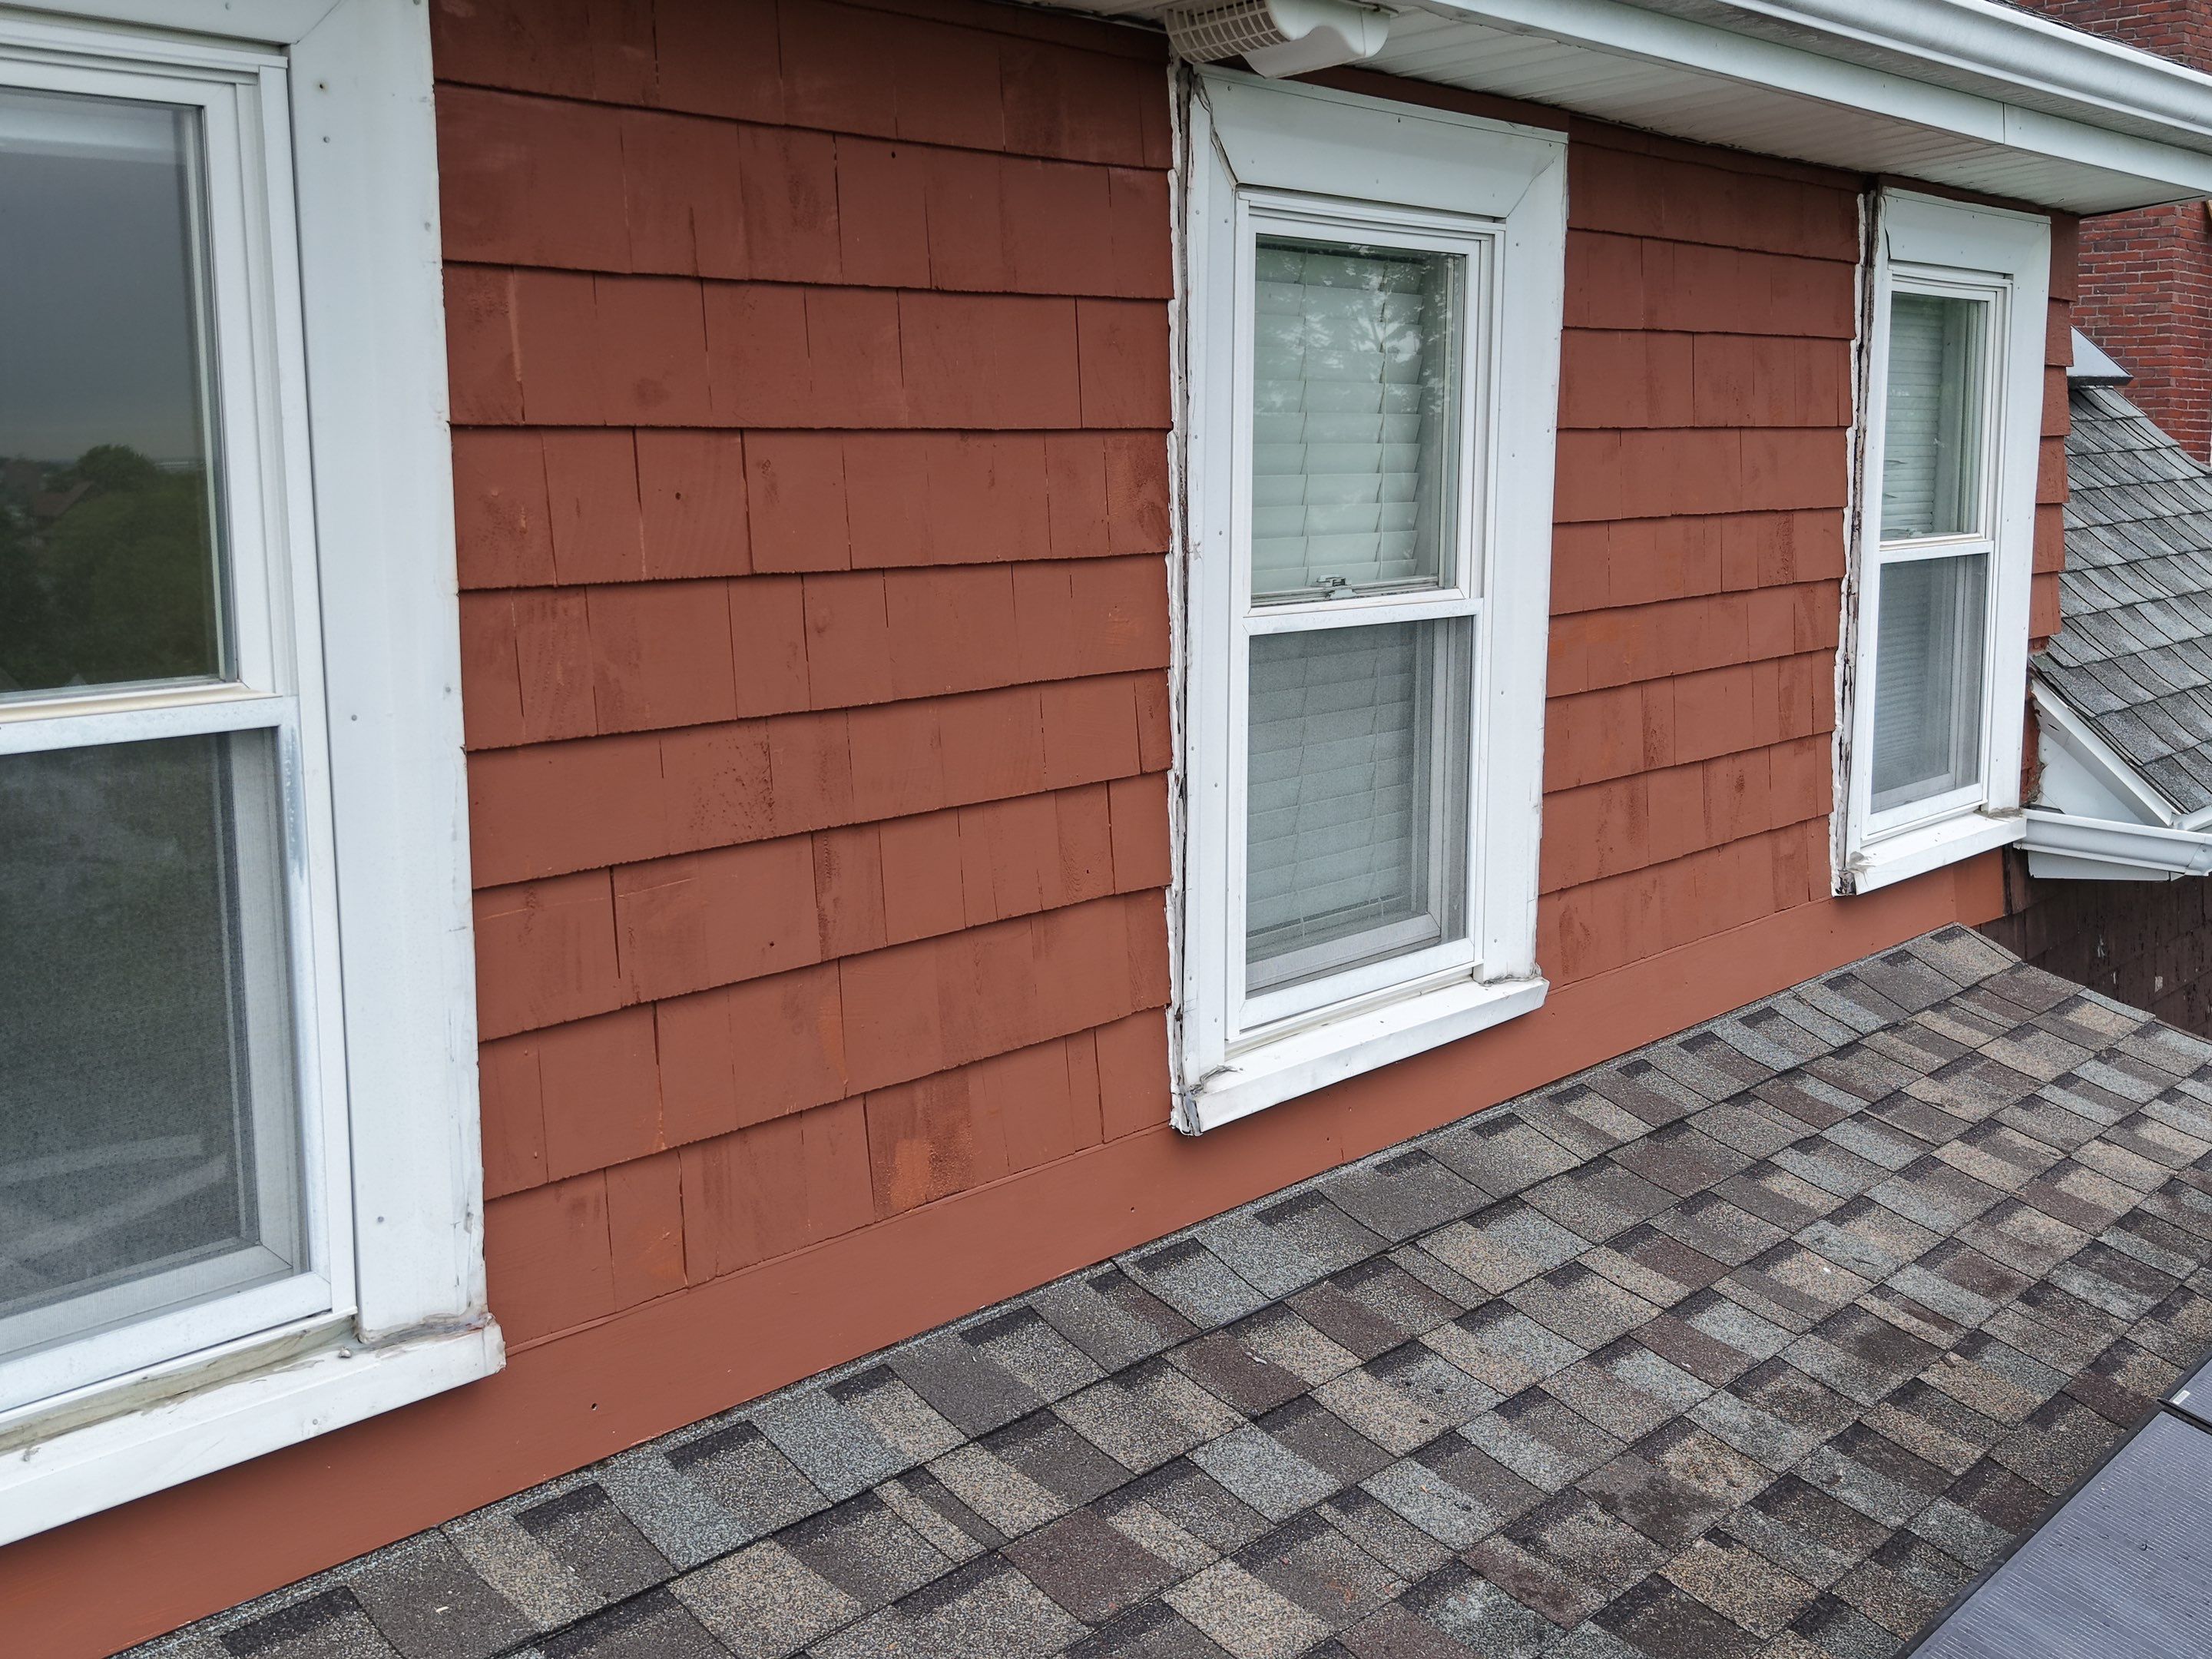
During the leak diagnosis process, we determined that the visible roofing materials were not the primary cause of the water intrusion. Instead, the inspection pointed toward deficiencies within the roof-to-wall flashing assembly, cedar shake siding details, and areas that had previously been treated with heavy caulking.
This discovery helped prevent unnecessary roofing work and allowed us to focus on the actual source of the leak.
Inspection findings included:
Active leak near the sunroom roof-to-wall transition
Heavy caulking around the cedar shake siding assembly
Evidence of previous repair attempts
Vulnerable siding and flashing details
Roof-to-wall areas needing proper waterproofing
Compromised shingles near the affected transition
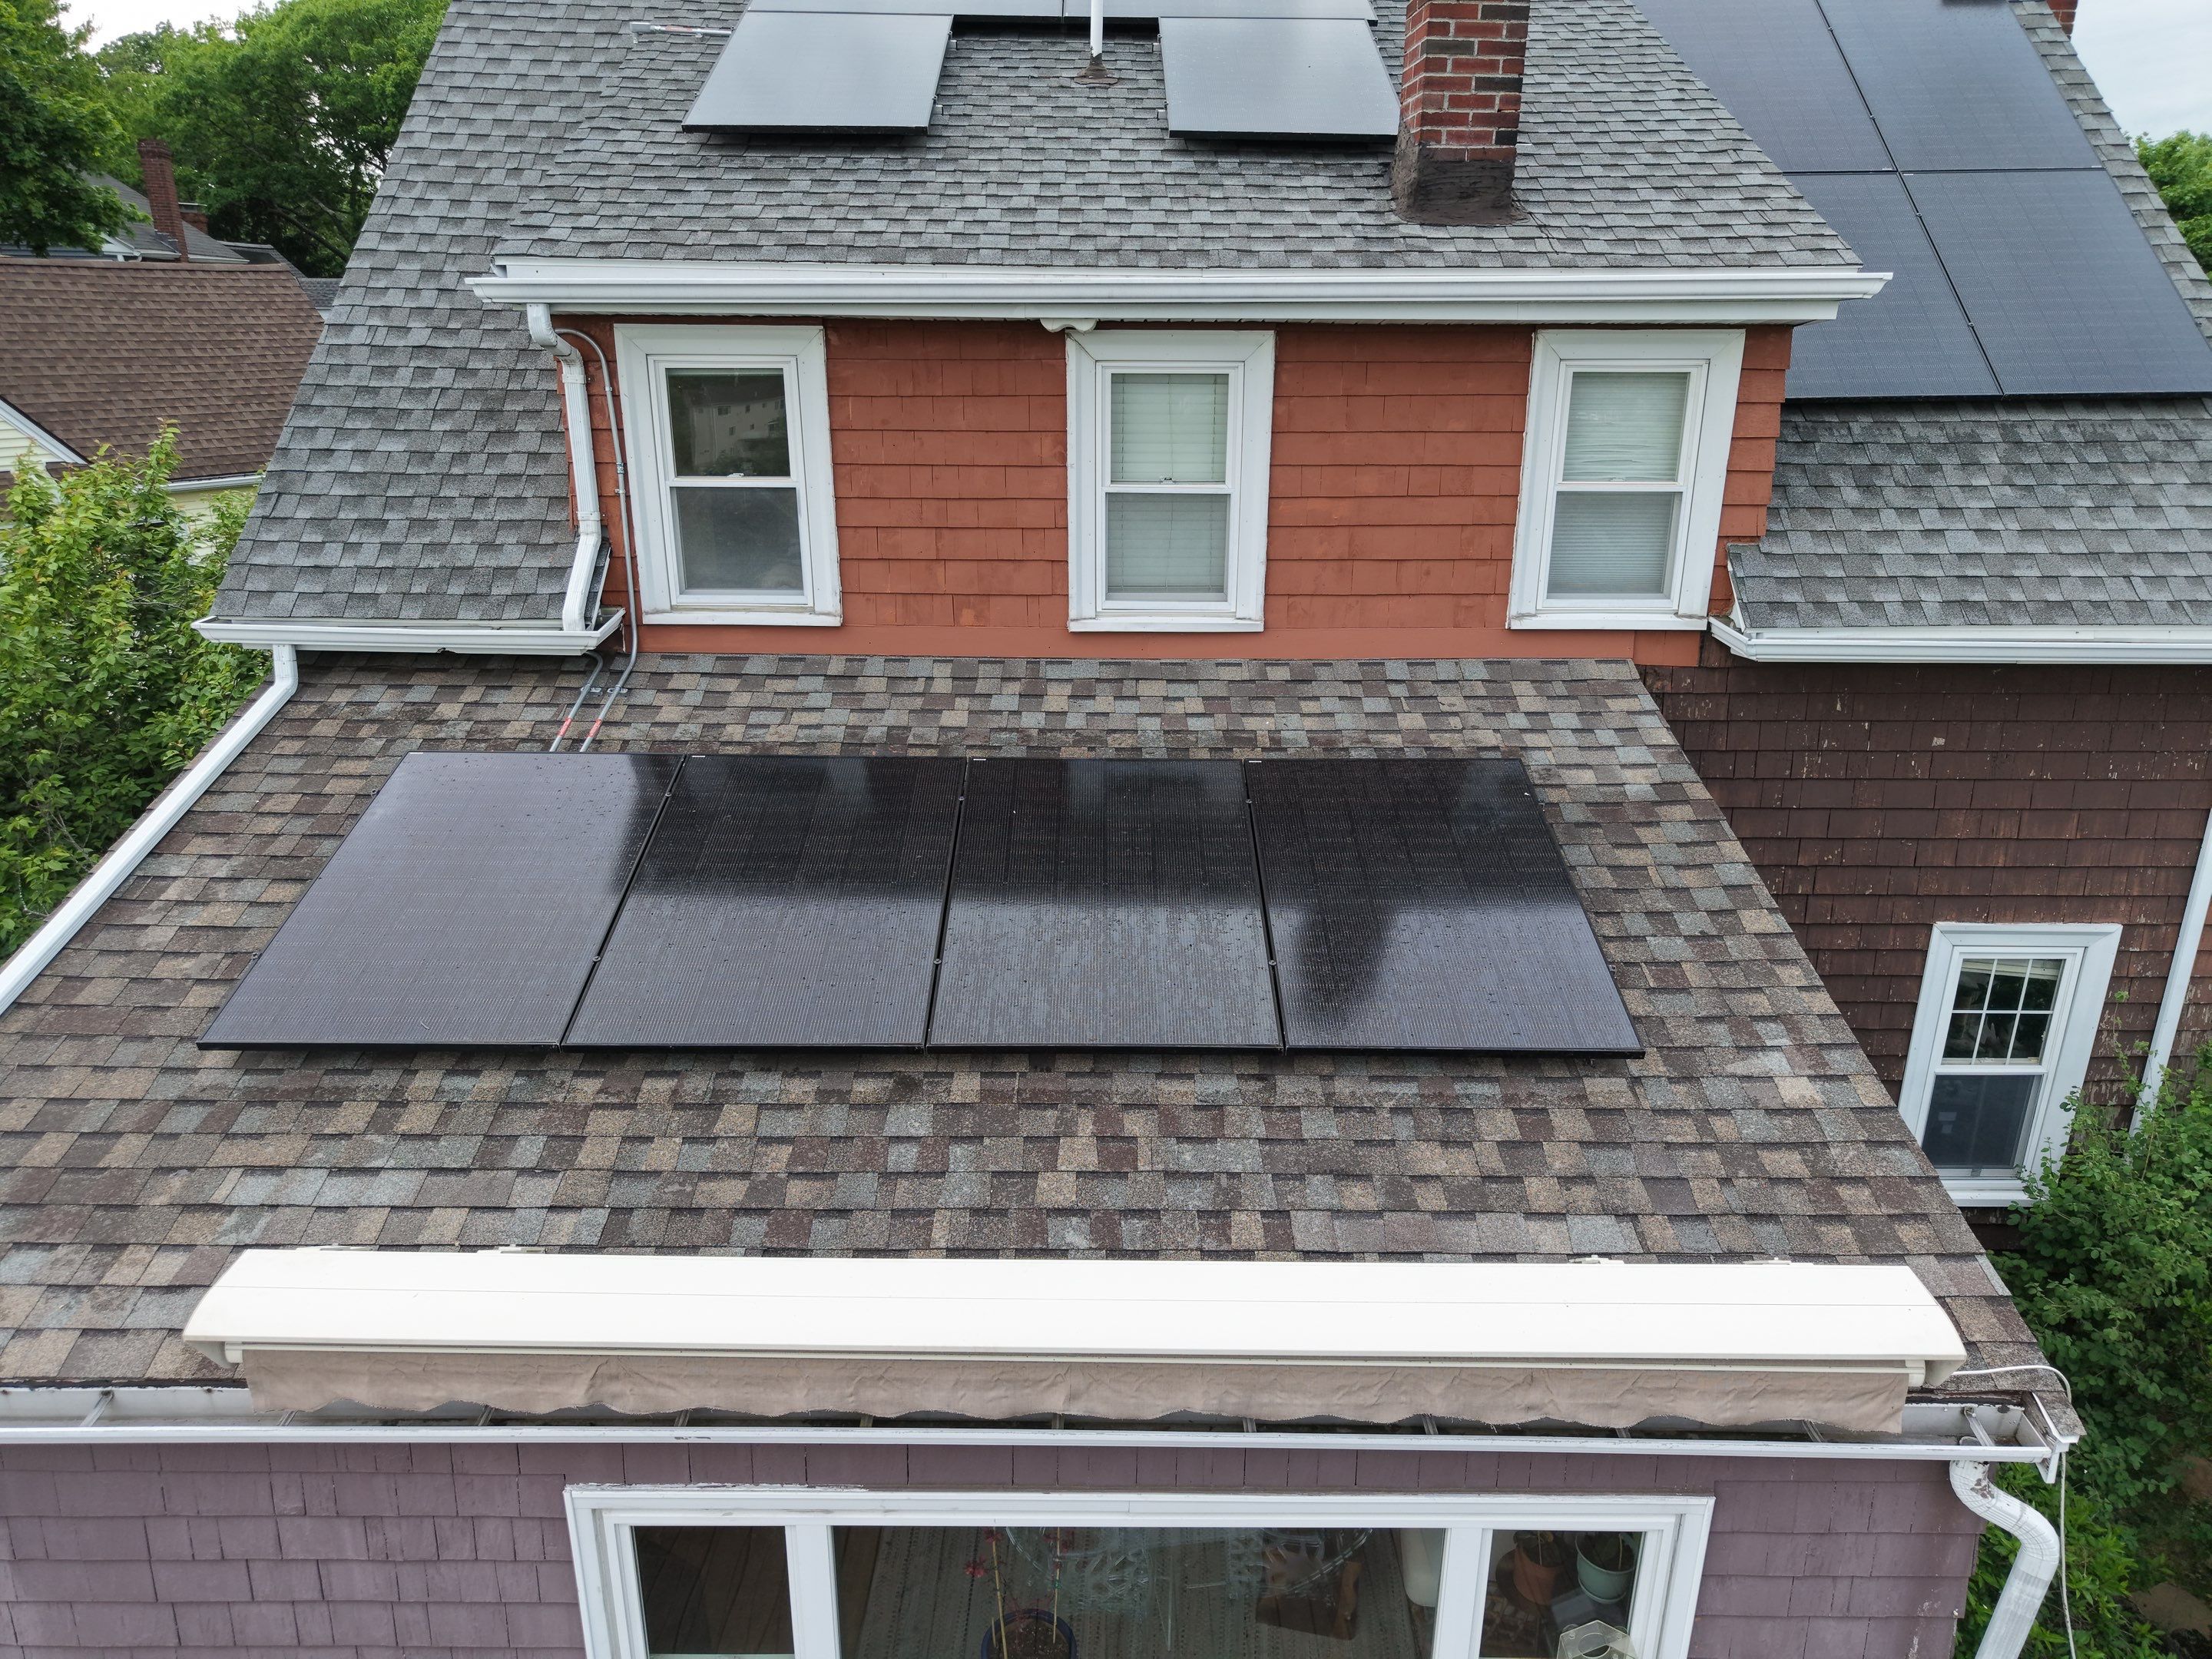
Awning brackets and attachment points requiring removal and reinstallation
Additional maintenance items, including chimney mortar deterioration and pipe boot concerns
The main priority was to stop the active leak and rebuild the affected transition correctly.
Why the Leak Keep Coming Back
Caulking can sometimes be part of a repair, but it should not be the main defense against water intrusion. When a wall, roofline, or flashing area depends heavily on sealant, it often means the system underneath is not managing water properly.
At this property, the siding and roof-to-wall transition needed to be opened up so the underlying issue could be addressed. That allowed us to install proper weather protection, flashing, siding, and roof repairs in the affected area.
This approach helped create a cleaner, more reliable repair instead of continuing the cycle of patching the same leak again.

The Repair Plan for the Malden Sunroom Leak
After identifying the likely leak pathway, we completed a focused repair around the sunroom wall and roof connection.
Our work included:
Removal of existing cedar shake siding in the affected wall area
Removal of one to three rows of shingles as needed near the roof-to-wall transition
Careful awning bracket and mounting plate removal
Inspection of exposed wall sheathing, roof decking, window surrounds, and framing
Surface cleaning and preparation
Installation of new weather barrier
Installation of ice and water protection at the roof-to-wall intersection
Replacement of compromised roofing shingles
Installation of new cedar shake siding
Priming and painting the repaired siding area to match the home as closely as practical
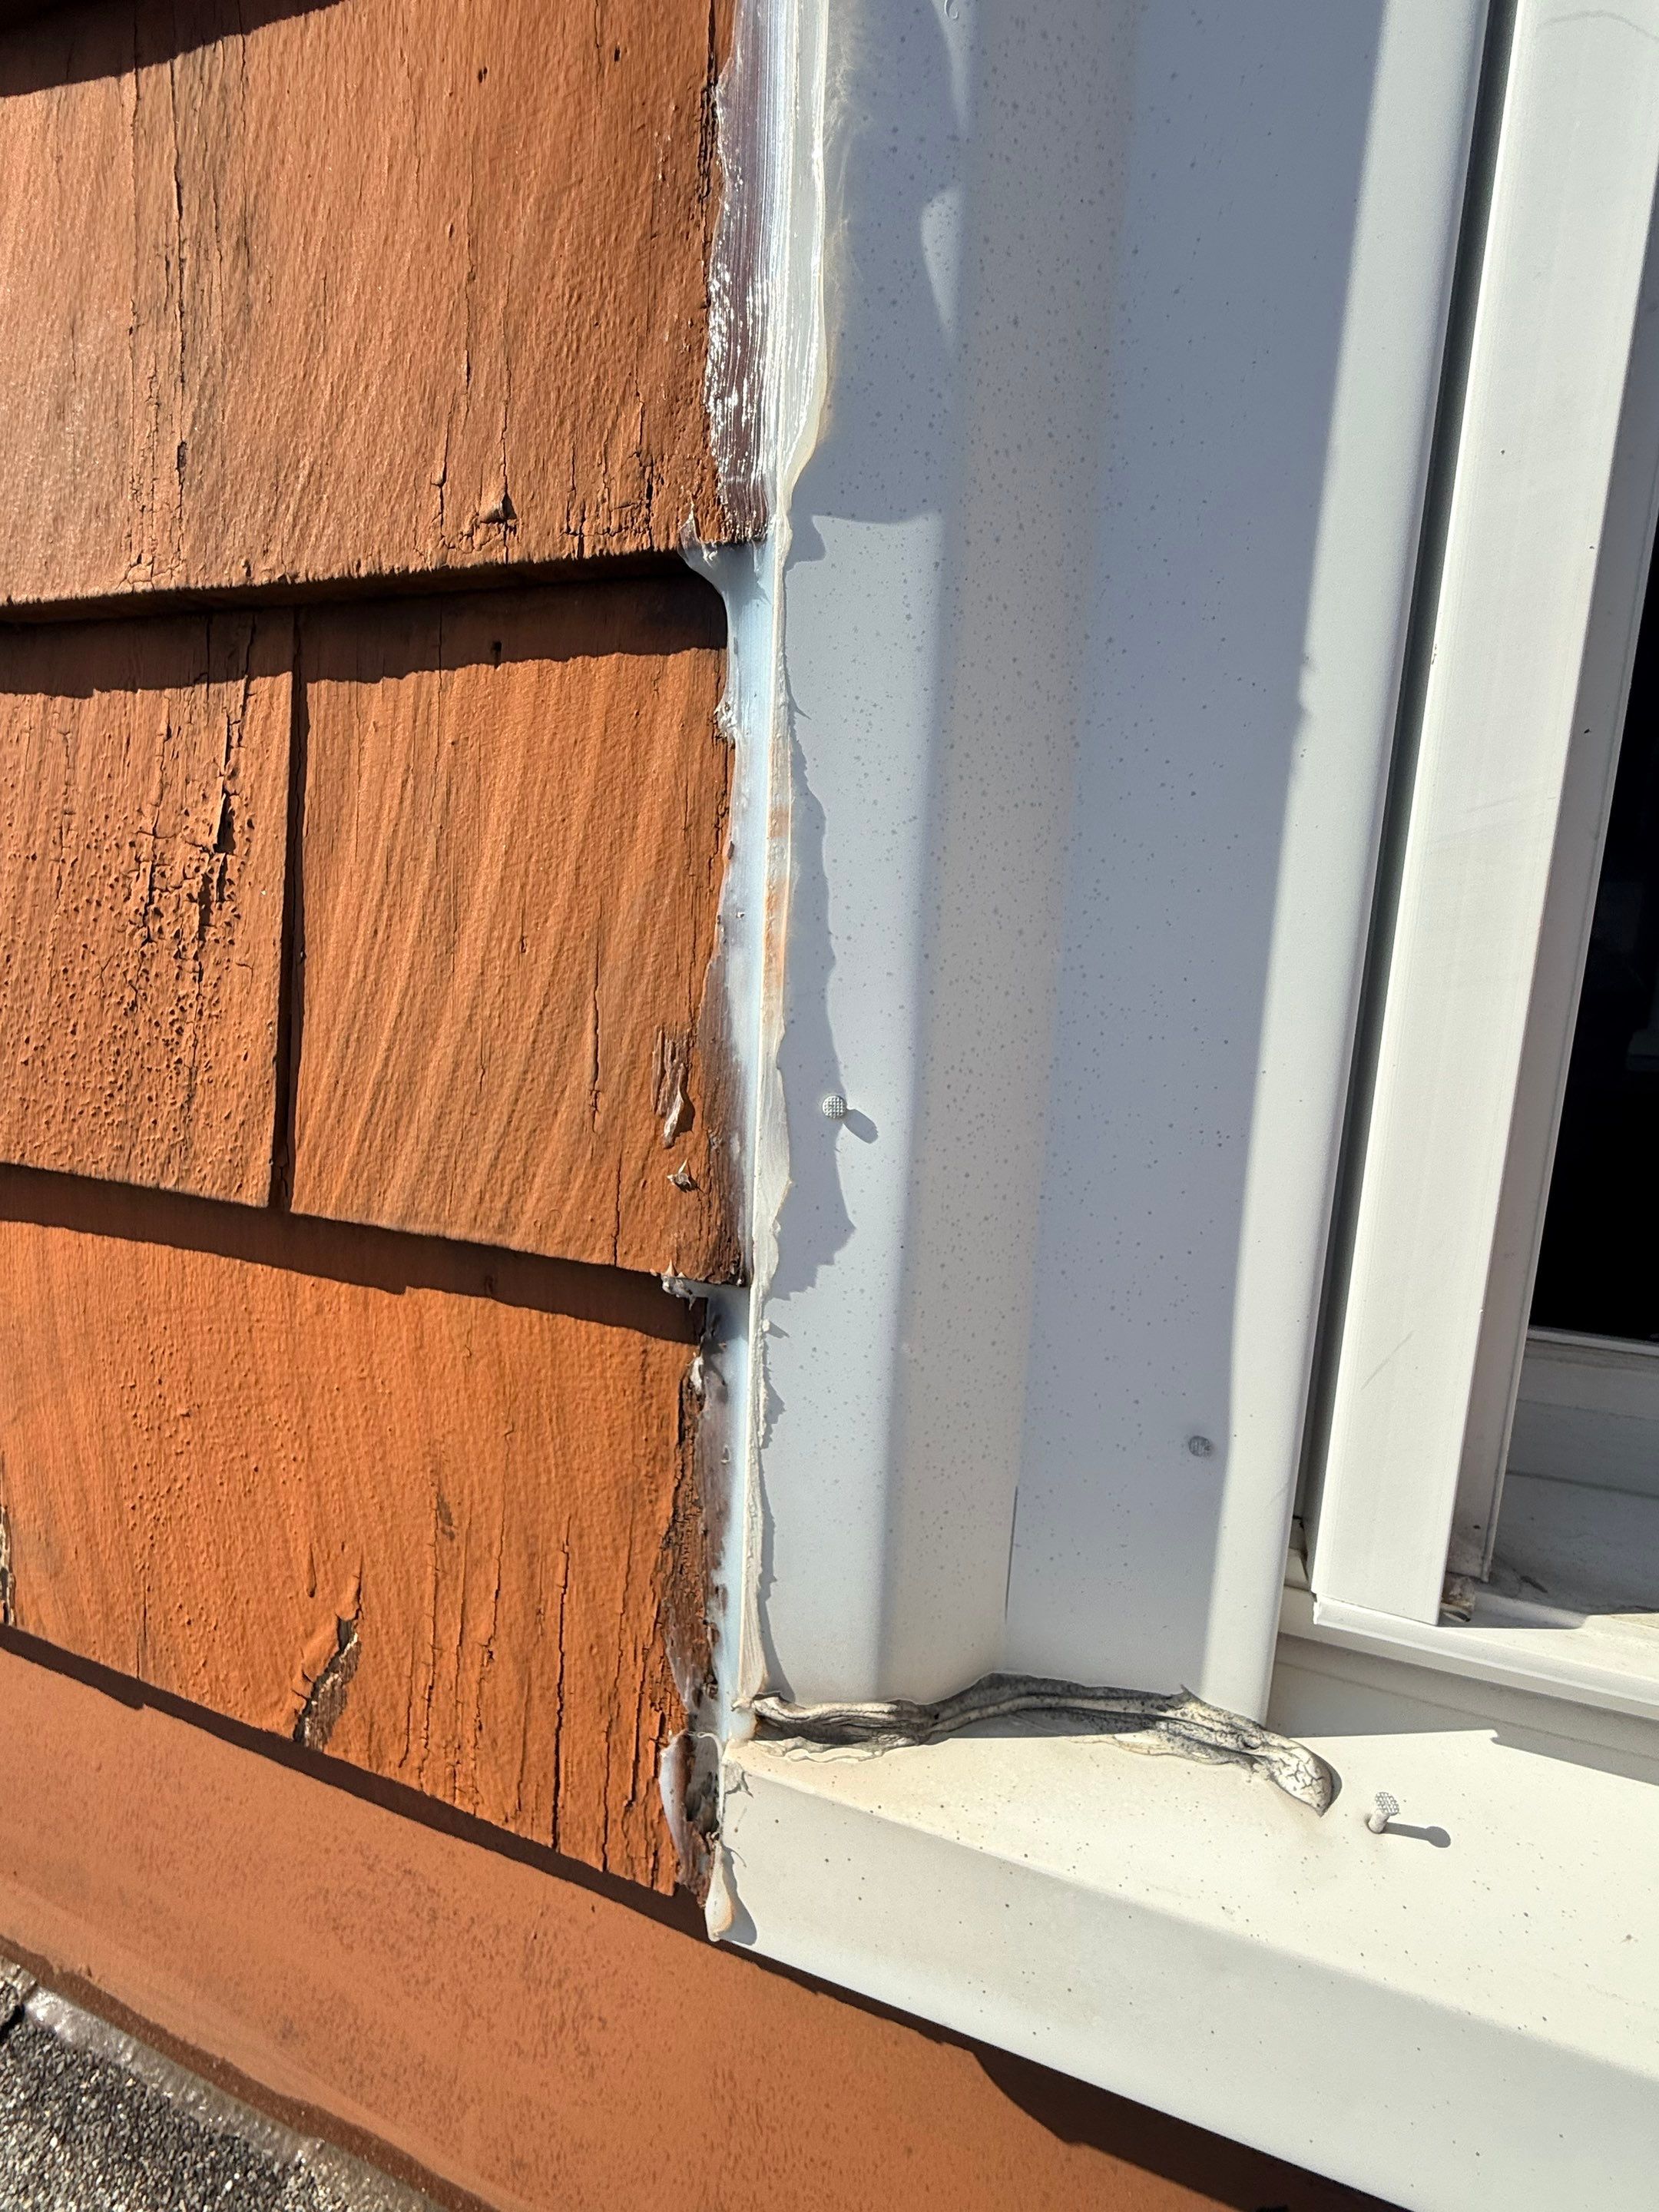
Flashing and Siding Leak Repair in Malden, MA
Many leak investigations in Malden involve water entering behind siding, flashing systems, or roof-to-wall transitions rather than through the main roofing field itself. Wind-driven rain and Nor'easter storms can expose weaknesses that remain hidden during normal weather conditions.
Our inspection process helps homeowners determine whether they need roof leak repair, flashing repair, siding leak repair, or a combination of exterior repairs to properly solve the issue.
Cedar Shake Siding Repair After Water Intrusion
Because the affected wall section involved cedar shake siding, we removed and replaced the siding in the repair area as part of the waterproofing process.
New cedar shake siding was installed after the flashing and weather barrier details were corrected. The repaired area was then primed and painted to match the existing home as closely as practical. This helped restore both protection and appearance while keeping the repair focused on the area that needed attention
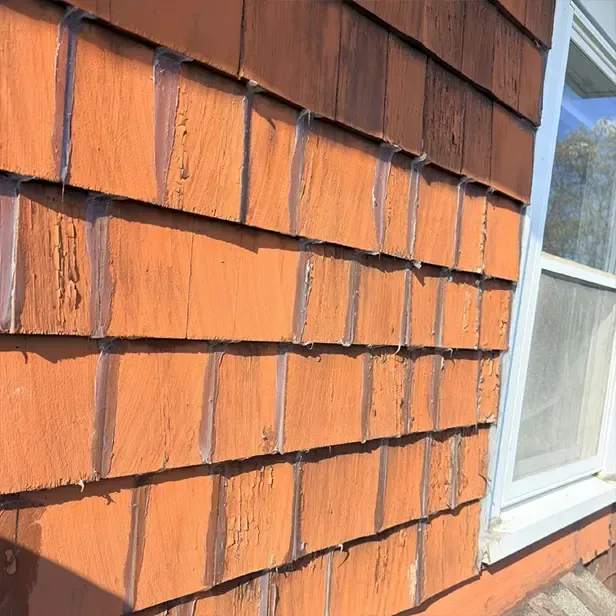
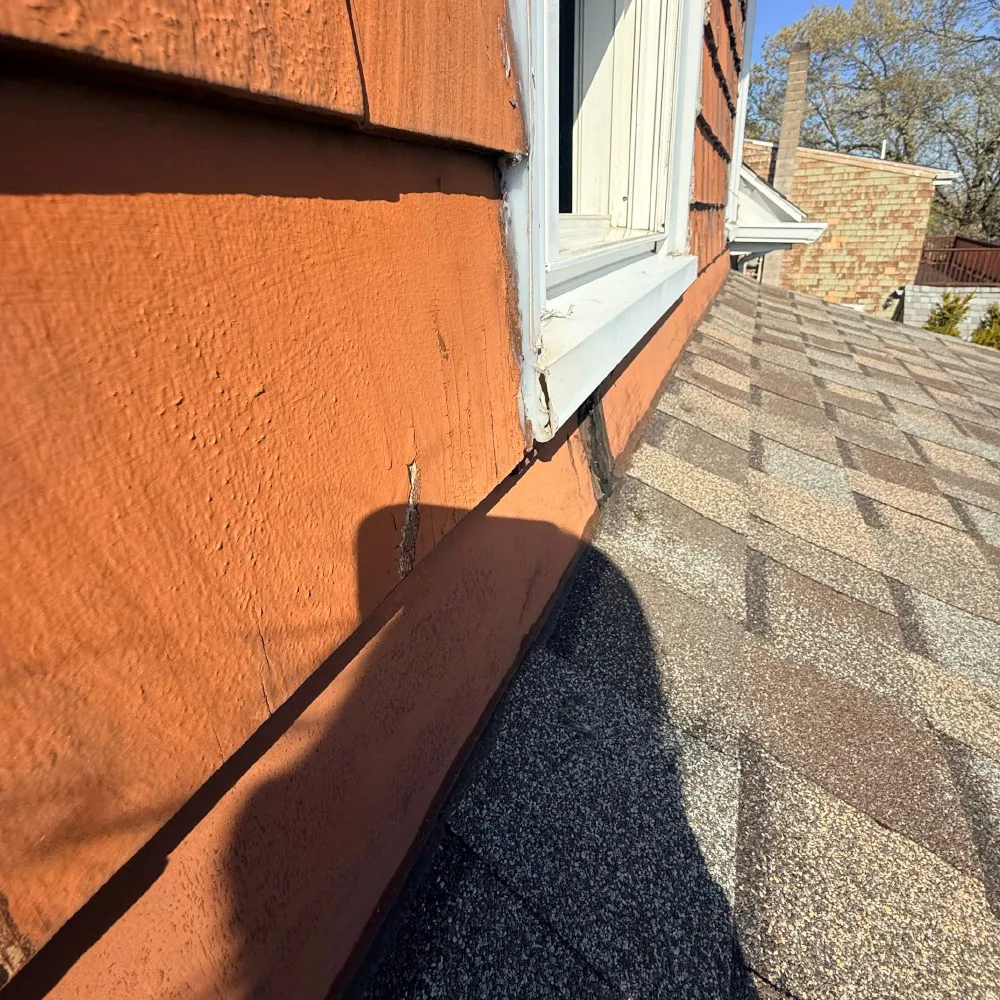
Before Repair
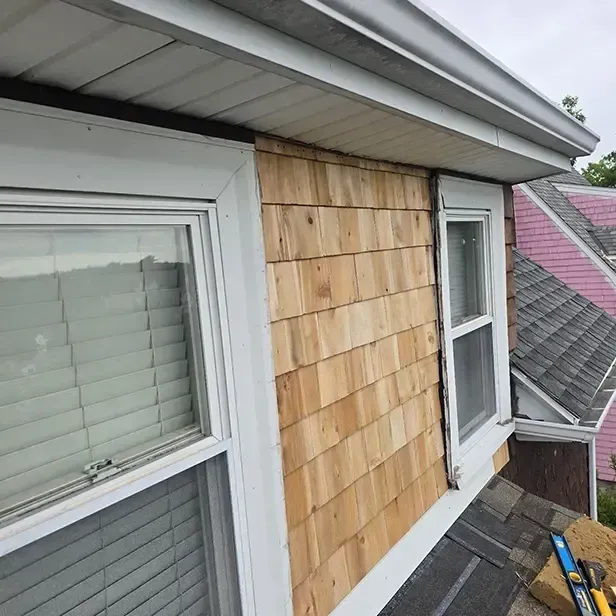
New Cedar Shake Siding Installed
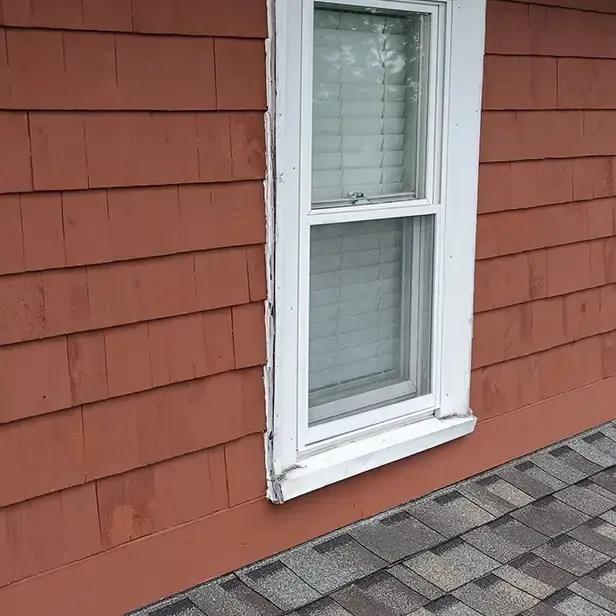
Primed and Painted Finish
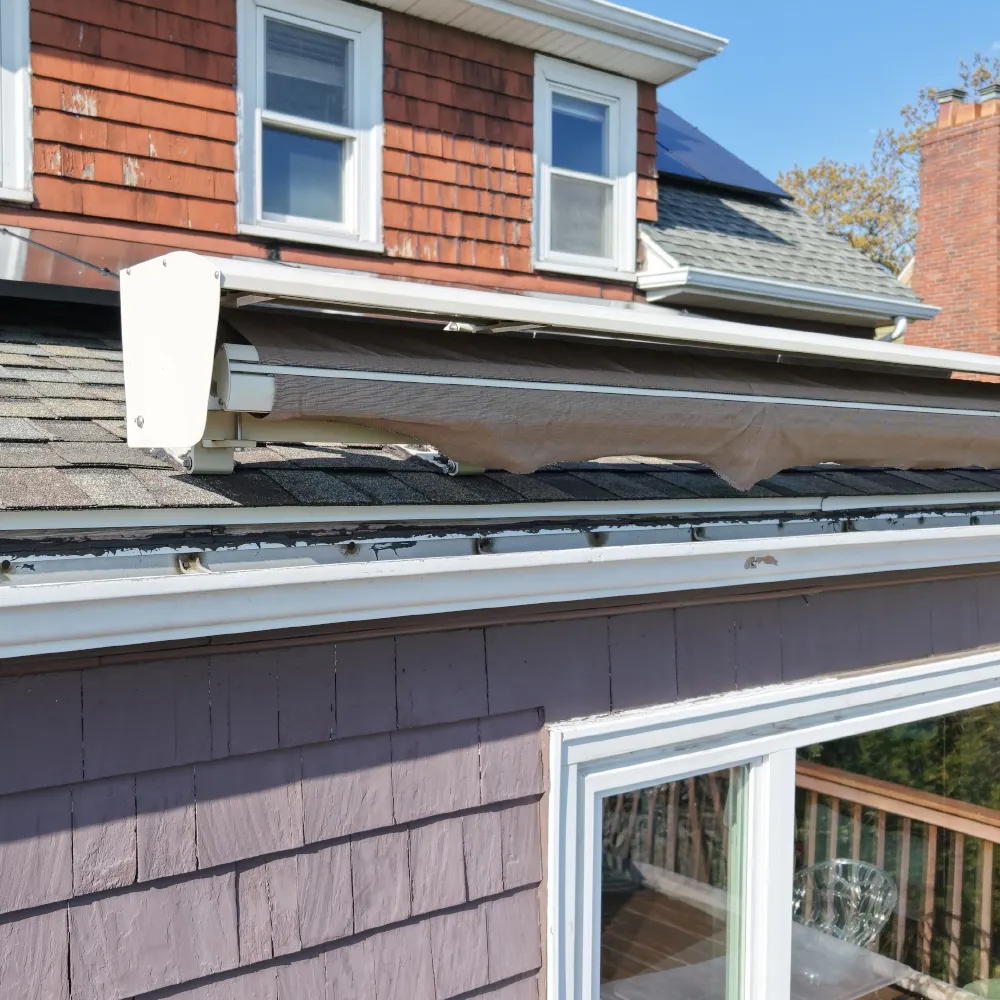
Awning Removal
and Reinstallation
The awning was part of the affected area, so it had to be carefully removed before the repair work could be completed.
Once the siding, flashing, and roofing details were corrected, the awning brackets and mounting points were reinstalled and sealed with compatible exterior-grade sealant.
This allowed the repair to address the full assembly instead of working around the attachment points and leaving potential leak paths behind.
Important Materials Used
This repair used a carefully selected combination of materials focused on waterproofing, flashing integration, siding replacement, and roof-to-wall protection to properly address the underlying sources of water intrusion identified during the inspection. Rather than relying on temporary fixes, each material was chosen to work together as part of a complete building-envelope repair system, ensuring that vulnerable transition points were properly sealed, reinforced, and protected against future wind-driven rain, moisture penetration, and weather-related deterioration.
Key materials included:
Ice and water shield for the roof-to-wall intersection
New aluminum step flashing
New counterflashing for the wall transition
Weather barrier for the exposed wall area
Replacement asphalt shingles in the affected roof section
New cedar shake siding for the repaired wall area
Exterior-grade sealant for awning brackets and penetrations
Primer and paint for the repaired cedar shake siding
These materials were selected to help correct the water entry pathway, protect the roof-to-wall transition, and restore the affected siding area.
Final Result
The completed repair corrected the vulnerable roof-to-wall transition and helped stop the active leak pathway at the sunroom addition.
Key outcomes included:
Active leak area opened and inspected
Temporary caulking approach replaced with proper flashing and waterproofing details
New ice and water protection installed
New step flashing and counterflashing installed
Compromised shingles replaced
Cedar shake siding repaired and repainted
Awning removed, reinstalled, and sealed properly
Homeowner received a more complete solution instead of another surface patch
This project is a strong example of why a proper inspection matters. What first appears to be a roof leak can sometimes involve siding, flashing, wall protection, and exterior attachments.


Roof Leak, Flashing, and Siding Repairs in Malden, MA
Homes in Malden often have additions, older siding systems, roof-to-wall transitions, and exterior details that can create hidden leak paths. When water enters the home, the visible stain is usually only the symptom.
Peak Quality Roofing helps Malden homeowners identify where water is actually getting in and whether the issue is related to roofing, flashing, siding, wall protection, or another part of the exterior system.
If your home has a recurring leak near a wall, addition, awning, chimney, skylight, or roof transition, a detailed inspection can help prevent repeated patch repairs.
Find Answers to Your Roofing Questions
How do I know if my roof needs to be replaced or just repaired?
If your roof has missing or damaged shingles, leaks, sagging, mold growth, or excessive granule loss, it may need repairs or replacement. We offer free inspections throughout Massachusetts to assess the condition and recommend the best solution.
What is the most common cause of roof leaks in older Boston homes?
In the Boston area, leaks most frequently occur around flashing points, specifically chimneys, skylights, and pipe vents. The extreme freeze-thaw cycles compromise old sealant and cause lead/metal flashing to crack.
My contractor mentioned 'Ice & Water Shield.' What is it, and is it required in Massachusetts?
Ice & Water Shield is a vital, self-adhering rubberized membrane applied under your shingles. It is required by code in Massachusetts to extend at least 24 inches past the interior wall line to prevent leaks caused by ice dams.
What is "attic ventilation," and why is it so important in cold climates like Boston?
Attic ventilation is the system that allows fresh air to flow into the attic and warm, moist air to escape. In cold climates like Boston, proper attic ventilation is critical because it helps prevent ice dams, reduces moisture buildup that can cause mold or wood rot, and protects the roof from premature damage. It also improves energy efficiency and is often required to meet building code and manufacturer warranty standards.
How long does a roof replacement take?
Most roof replacements in MA take one to two days, depending on the size, complexity, and weather conditions. Our team ensures minimal disruption while maintaining high-quality workmanship.
What types of roofing materials do you offer?
We specialize in asphalt shingles, rubber/flat roofing, and metal roofing, offering durable solutions that can withstand Massachusetts’ changing weather conditions.
Do you offer any financing options or payment plans for roofing projects?
Yes, we understand that a new roof is a significant investment, and we want to make the process as accessible as possible. We partner with reputable financing providers to offer a range of options for qualified homeowners. These may include plans with low monthly payments, deferred payment options, or promotional interest rates. We can discuss the available financing programs during your consultation and help you find a plan that fits your budget. Please ask your project consultant for more details and to learn about the application process.
How much does a new roof cost in Massachusetts?
The cost depends on factors like roof size, material choice, labor, and complexity. We provide free, detailed estimates to homeowners across MA.

CUSTOMER CARE
OFFICE LOCATION
58 Mount Vernon Ave, Melrose, MA 02176

FOLLOW US ON
Copyright 2025. All rights reserved.
Website by Pure Value Advisors

FOLLOW US ON
OFFICE LOCATION
58 Mount Vernon Ave, Melrose, MA 02176
Copyright 2025. All rights reserved. Website by Pure Value Advisors